Implementation
First, there is no IT provision required, so as a teacher, you can start in Figma right away. What you will need to use the education account for free is to get it verified, which you can do through figma.com/education/apply. After going through the verification process successfully and having an empty template in front of you, there is a possibility to invite the students to be editors (on the right side above). You will get the possibility to insert your students’ addresses for that. What you also can do is send your students a link that they can use and that provides them the rights to edit.
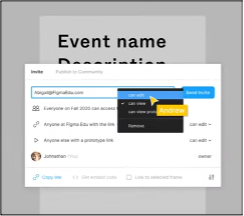
After your students are invited and have accessed Figma through your invitations, you can start designing together. During observation mode, you can give lectures to students, without having to share your screen. The students will see what you are doing. After your lesson, your students will be able to break out in groups and create on their own. In order to provide feedback, you can use sticky notes for example or write directly on the canvas, like below:
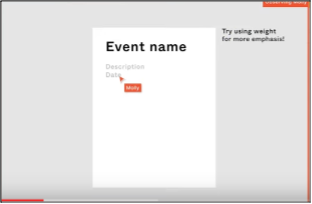
Also, after the students have completed their assignments, you will be able to have an overview of their results and by clicking on the presentation mode, you will be able to see all their works presented, without clicking and scrolling.
Figma can also serve as a central hub for all your classroom assignments:
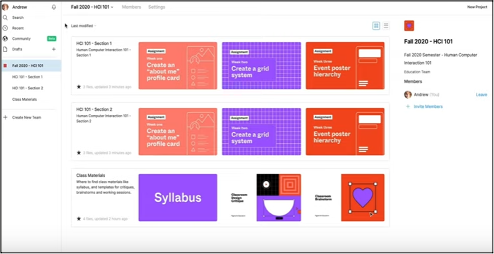
There, the files are always up to date, without having to email the most recent versions. A very convenient feature is also to create own teams:
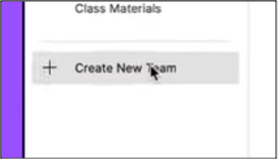
Teams in Figma have a description field where you can insert all the important information and resources you wish:
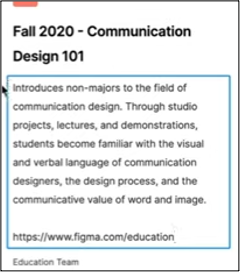
To create a new project, you can click on the button New Project, above the team description on the right side. Projects have a description field, just like teams.
- Describe the Purpose/Problem Definition
- General Overview: It can be hard to think of something which enables the students to be creative and for them to learn how to design in a collaborative manner. Most of the tools for the creative purposes, such as designing are developed for individual use. However, for a teacher to provide education in a project (or workshop) context, it is most convenient to have a tool, which enables the students to work together on an assignment. Figma provides this possibility, moreover, the teacher can give classes to students or collect their work for assessment in Figma.
-
Classroom Activity:
First, a brief presentation for the students (max. 10 minutes). You can show them a
video on how to create a student account for example or show them some important video parts from a
video for the beginning users of Figma. For the students to get familiar with Figma, first individually, but at the same time seeing each other’s work, the student trading cards activity will fit the most. What the students must develop is their profile in the social media style where for instance the auto layout is involved. When the students will design in the same Figma space, they will see a bit of each other’s style and process, which could be helpful for own designs. When each student has finished the activity, you as a teacher can create a page in the file you are working in, which can serve as a gallery. It can occur that some of your students might already be familiar with Figma, in that case you can challenge them with extra tasks, like adding own questions and an icebreaker that they can share with other students. Thus, this activity enables the students to get to know each other (even better).

- Implement the Tool
- General Overview: The students are globally familiar with Figma and are now able to create something there. They have already tried to and have created something in Figma. For you as a teacher, it was also the first step getting to know how educating through Figma can be like. Now, you will get a more in-depth experience with Figma, which will facilitate its use for you and your students, which will show more important features that Figma provides.
- Classroom Activity: To have a better feeling with the actual design process (making shapes for instance), the students can get assigned with a task to make a heart shape with Figma’s pen tool, layout grid and properties, after which the heart shape can be customised. Of course, you don’t have to use the heart shape, you can also go for any other shape you would like your students to design, and which is probably more relevant for the tech education. After the students are done with this activity, you can again create a “gallery” to see all students’ work in a clear overview. If you have already some students already experienced in Figma, you can ask them to make the heart shape pulse with the Smart Animate feature provided by Figma. They can also make other shapes and style them according to their preferences. This will make the classroom activity extra challenging for them. It is also possible to assign this as a homework activity if that is of your preference.
- Collect Data after Tool Implementation:
- General Overview: Collecting data is in this case something different than probably interpreted at first. The overall aim here is to check what else is possible with Figma, so that the students are aware of it and know that they can explore it further in Figma. When the students will learn everything that Figma provides, they will be able to create much more there than they first would imagine.
- Classroom Activity: Let the students explore Figma freely, without any directions other than to search for all the features that seem interesting for them to use. Thus, they will learn even more about Figma and what it has to offer. You can ask them to discover and provide three to five Figma features of their preference.
- Analyse the Data and Reflect on the Outcome
- General Overview: Check with the students what features they have explored in Figma and what they like the most to work on, to gain more skills with this Tool. You can have a rating session and eventually create a top 3 or top 5 of the Figma features, which you could explore with your students deeper. Thus, they will have the most benefit of this tool.
- Classroom Activity: Let your students form groups based on one the Figma’s feature’s top 3 or top 5 and ask them to prepare a presentation (in Figma) about that feature with some examples. Thus, they will already learn everything about the feature of their preference and will be able to experiment with it already for the examples. By seeing the presentations of other groups, the students will get to learn the use the other Figma’s features preferred by the students.