Use in the classroom
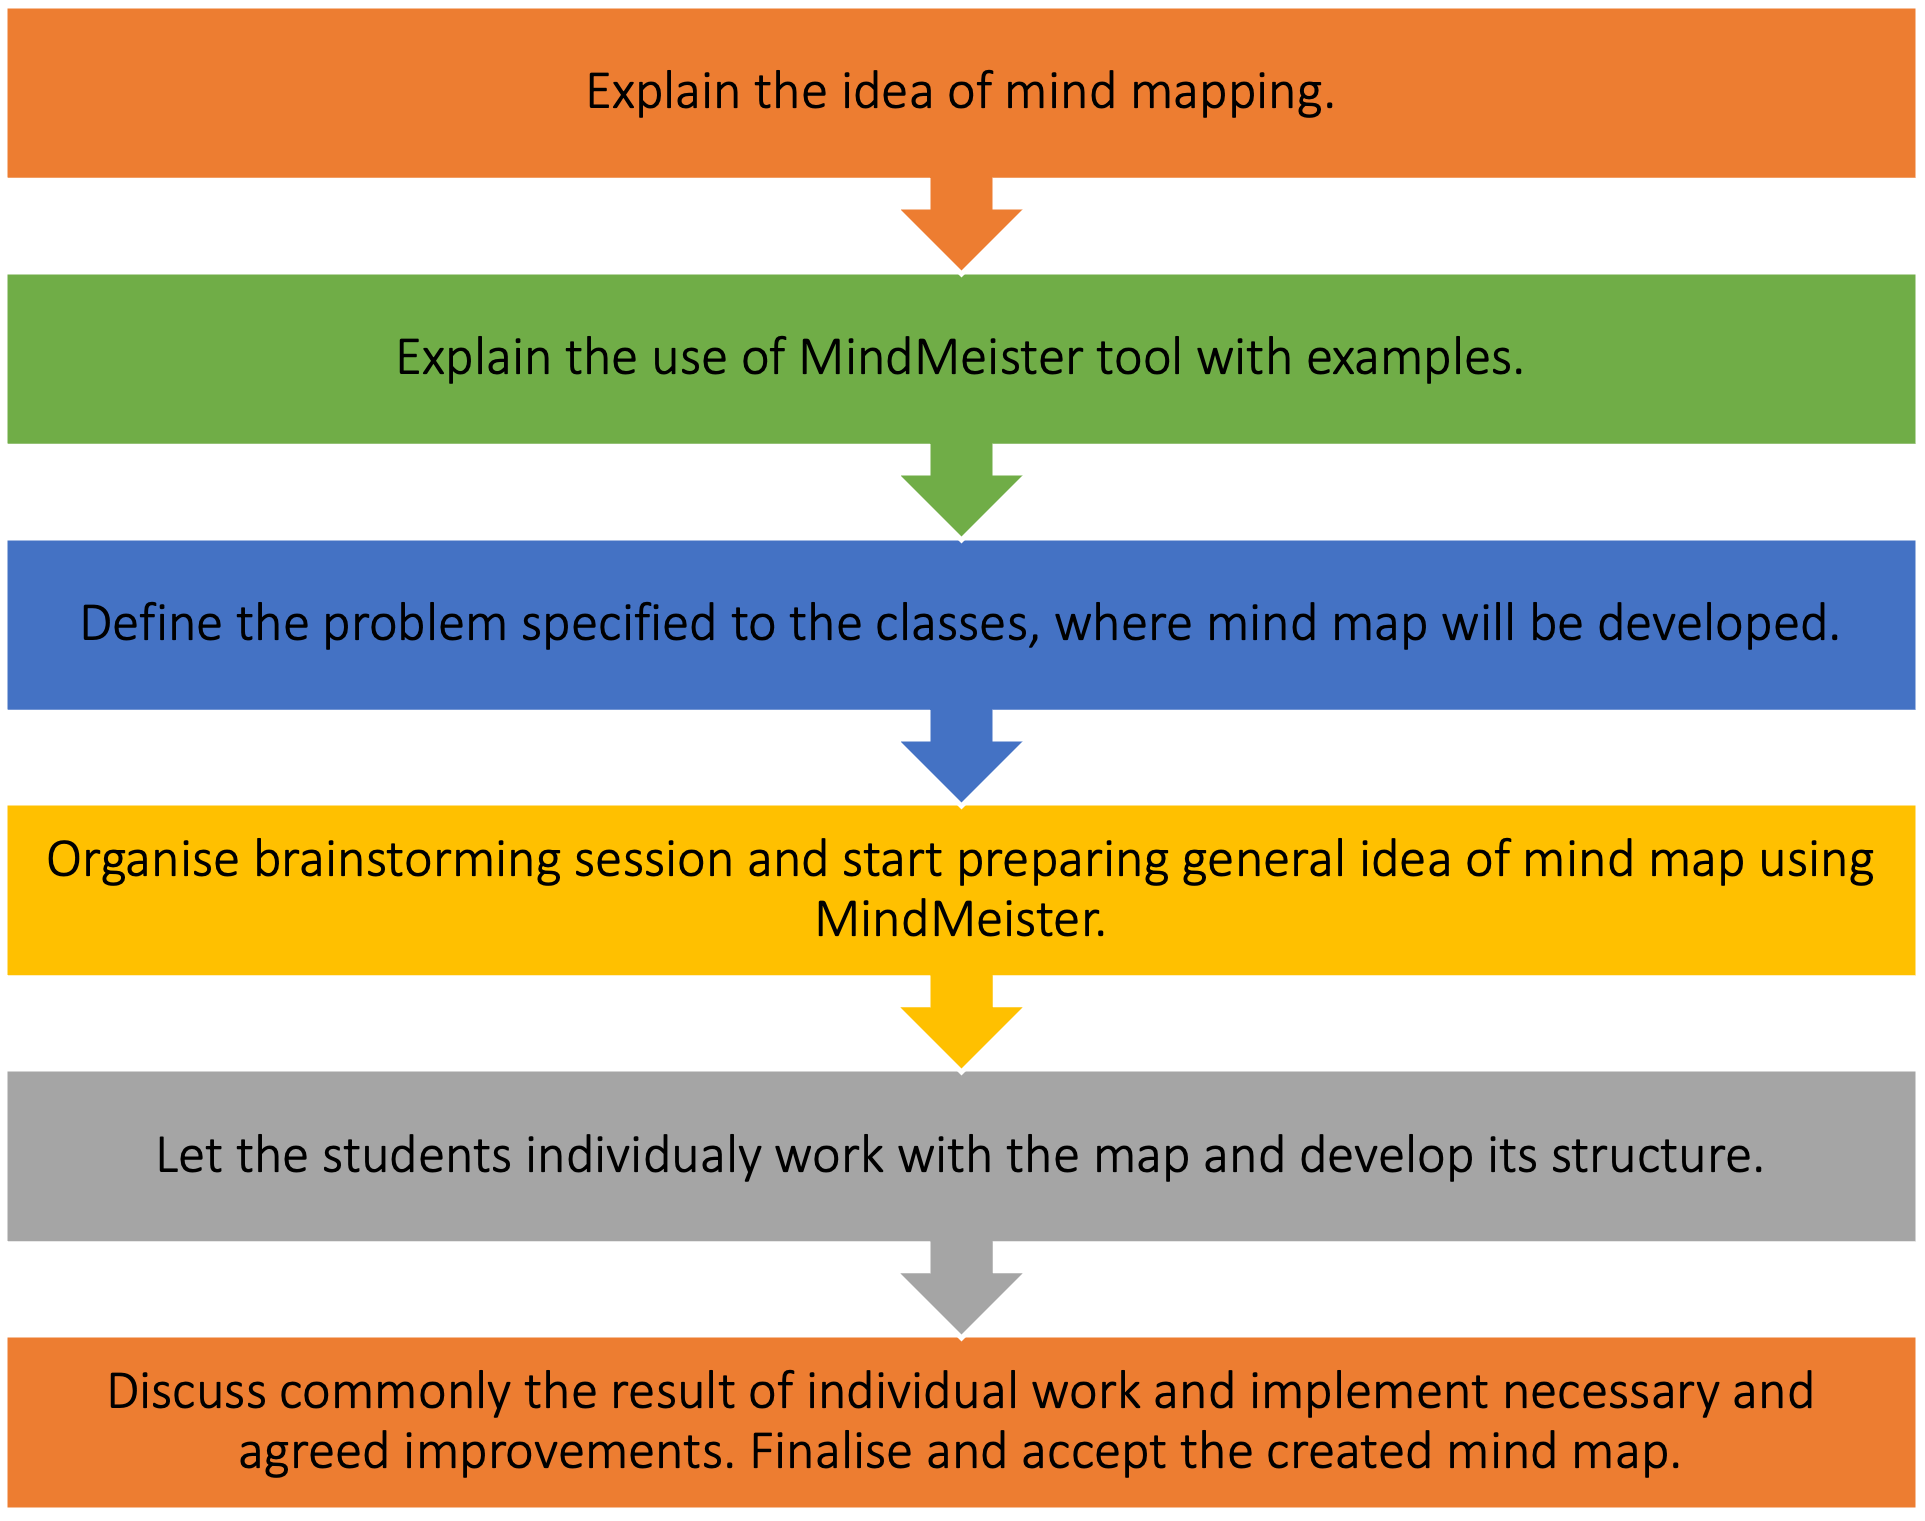
Applying MindMeister as a tool supporting the classes is quite easy even for inexperienced users. However, it requires the students to present from one side – the role and idea of mind mapping and from the other side – the way to work with the tool. HE teachers should visualise some examples of existing mind maps to ease the understanding of mind map creation process. After explaining the tool facilities and the background of mind mapping, HE teachers should define the problem specified to the students in the class and organise brainstorming sessions, which in effect will be the general idea of mind map referring to the problem stated. The specified topics presented in a commonly created mind map can then be individually developed by students. After some time, spending for individual work with mind map, HE teachers can organise common discussion to analyse the added sub-topics, notes, connections and links or photos. Teacher and students can together decide, if some changes or supplementary information are required to finalise the map creation. The general idea of implementing the MindMeister by HE teacher in the classroom is presented on the figure below.
Explain the idea of mind mapping
General Overview
Students should understand what the aim, role and crucial activities is while applying the mind mapping. Teacher should briefly present the definition, key elements of mind mapping process and indicate the role of main idea/topic and sub ideas/sub-topics and the associations between them.
Classroom Activity
At the beginning of the class, teacher can explain the idea of mind mapping and benefits of using this too. Teacher can present the definition of mind mapping and key elements that students follow during mind map creation. Teacher can also indicate that mind mapping is useful organisational technique that involves creating a visual diagram to capture and structure information, ideas, or concepts. While presenting the idea of mind mapping, the teacher can specify that a mind map is a diagram for representing tasks, words, concepts, or items linked to and arranged around a central concept or subject using a non-linear graphical layout that allows the user to build an intuitive framework around a central concept. A central concept is linked via lines to other concepts which in turn are linked with other associated ideas. Additionally, the key steps to make for an effective mind map are explained:
- Determination the central idea/concept, core reason one wants to focus on when creating a mind map. There is one key concept, often expressed graphically as an image or by short name.
- Adding branches to the main concept. These are the sub-ideas or information that emanate from the central idea. The main branches which flow from the central image represents the key themes. Sub-ideas that directly branch out from the central idea are known as first-level associations.
- Exploration topics by adding more branches. There is created the more in-depth structure in which the organisation of sub-levels is provided. The exploration each of the themes in depth is reflected by adding child branches to capture information and add more details.
- Adding visual effects, i.eg. images, colours text size. The name of branches, connections should be emphasized with an array of different colours. Images and/or symbols can be added to the content. All visual elements should underline she created structure, emphasize important points, and let to engage people in mind map exploration.
- Revisiting and analysing the created mind map to put things in order and make final revision.
The activity referring to the mind mapping idea explanation should be finished in 10 minutes.
Explain the use the MindMeister tool with examples
General Overview
Students need to familiarise themselves with the use of the tool. HE teacher can present how to log to the tool, what are the main facilities available and how to use them in practice.
Classroom Activity
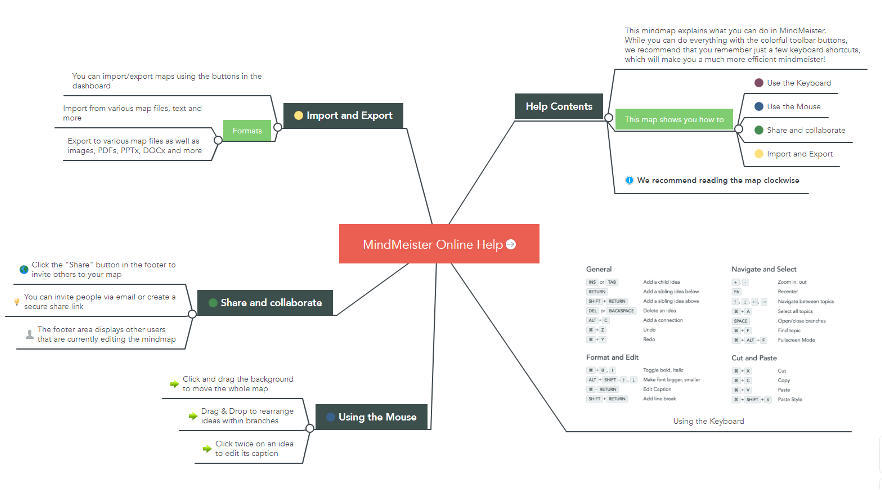
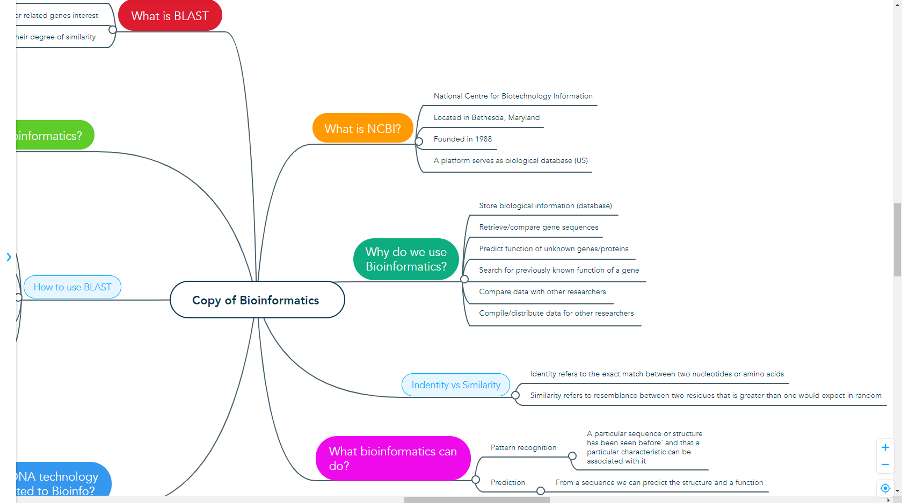
Teacher can present the MindMeister facilities to students. He/she displays on screen the MindMeister webpage and provides the presentation of the software. Teacher includes in the presentation the already existing mind maps to show the results of mind mapping process. The screens of one of the examples of mind map created in MindMeister are presented in the figures below.
Students can assist the teacher using their computers and try to use the basic MindMeister functions explained by the teacher. The following steps are required to start working with the tool:
- User should sign up for MindMeister by link: https://www.mindmeister.com/mm/signup/basic. After participating he/she has access to the home page and can review all created mind maps.
- To create a new map the user, need to click the “My New Mind Map” button. The mind map editor will be available. In the middle of the page, there will be seen a main topic section, where the topic of the created mind map should be entered.
- Once the user has created the main topic, the possibility to add sub-topics by pressing the tab key is available. After adding all the sub-topics, the mind map creation can be finished by clicking “enter”. Clicking enter one more time allows to create another topic. Added in this way topics are in mind map recognised as related topics.
- With the help of the two keys mentioned above – enter and tab, user can create the main topic and related topics.
- Removing or adding related topics can be done by using “connect” to add a topic and “disconnect” to remove it.
- MindMeister also allows to add labels and change the colours of connections.
- The finished mind map can be shared with students, teachers and other participants involved in learning process, so they can share their ideas and comments. The activities on use of MindMeister should take 15 minutes to complete.
Define the problem specified to the classes, where mind map will be developed
General Overview
Once the students are acquainted with mind mapping approach and MindMeister software they should start working on the problem/concept/idea posted by the teacher. Teacher should define the main topic and engage student in map creation.
Classroom Activity
HE teachers need to determine the topic, which will be the basis of map development and refers to classes. He/she explains that one map will be created commonly on a given subject. MindMeister is available and ready for map creation. The screen with MindMeister is presented for the audience. The general idea is entered and displayed as a new mind map. Teacher organizes the brainstorming session with students. Teacher indicates that the general idea and main branches will be developed commonly. The sub concepts proposed by students are continuously introduced to MindMeister and presented to review. The activity should be finished when the main concept is developed by first or the second level associations, because it will be the basis for students’ individual work. The common development of mind map should take 10 minutes.
Let the students individually work with the map and develop its structure
General Overview
Students should participate in development of already created general map. They should have the opportunity to work individually, focus on one of proposed sub concept and add new related items.
Classroom Activity
The specified topic presented in a commonly created mind map should be in this step individually developed by students. Teacher decides which concept will be develop by which student. If the group of students is larger than number of concepts, they can work in pairs. Students within 10 minutes will add additional sub-topics, notes, connections to the specified for them concept. They should add some visualisation effects to better express the progress of their work.
Discuss commonly the result of individual work and implement necessary and agreed improvements. Finalise and accept the created mind map:
General Overview
After working individually with the mind map, the effort is presented for common discussion and necessary improvements. Students and teacher can propose changes in developed individually items or given connections. These actions should lead to achieve satisfied effect of mind mapping process.
Classroom Activity
Teacher and students should commonly discus the effects of their work from previous steps. HE teacher organizes common discussion to analyse the added sub-topics, notes, connections, visualisation effects and ask for proposed changes. Teacher and students can together decide, if given improvements allows to achieve better quality of mind map. The agreed changes are implemented to mind map. The activity should finish by acceptance of created mind map. The discussion and improvements should be done within 10 minutes.